Sunday 29 May 2011

Week 17 ( recipe , pick a square)

Week 17 now over at 'Less is More', how
time flies! Here is my card for this weeks
challenge. I used a LOTV image,(it looked
too large to stamp  on my card so I scanned it ,
resized it ,then printed it onto card then matted it.
Such a sweet image I think don't you ??
Used my new nesties for a frame and  the sentiment
is computer generated.I added a bit of glamour
dust on the little girl & the first letters of the sentiment.
Copics to colour and chalked edge to image.Some
lovely inspiration already fellow LIMettes &
C&M, look forward to seeing more
during the week, hope you are all enjoying your
long weekend :O)
Viv xx

Monday 23 May 2011

LIM week 16 ( card 3)

Here is my third and last ( I think) card for the 'Less is More'
challenge again.My simplest of the three I think. I used a
circle template to colour with distress ink and chalks. Then
I used my branch stamp ( details on last card) and leaves
from the same stamp set too. The first time I used the leaves
they didn't look right at all, I did better this time thank heavens.
I added three punched butterflies in black and added some
gems for sparkle.May add a sentiment at a later date but
liking the white space atm.Have a lovely week everyone &
thanks for all the lovely comments as always :O) Viv xx


Sunday 22 May 2011

LIM week 16 (card 2)

My second card this week for the 'Less is More' challenge again.
Trying my hand at stamping on two layers at once ( should have
tried it on two pieces of card separately I think). Anyway I stamped
then raised one piece by 3d-ing it. Loving my new tree , branch and
leaves stamp set( Create a Scene by Creative Expressions). Then I
used my Distress inks again, antique linen, worn lipstick,broken china
& brushed corduroy.Added a little dark brown Prisma pencil to 'ground'
the trees and to fill in the gaps left when I stamped on two layers at once.
Didn't realise it leaves gaps when you do that................lesson learned.
Then I used  a small punch for the butterflies and coloured them in Pumpkin
using my Promarker pen for a pop of colour. It does look a bit 'busy' for
a LIM card I realised when I had finished it........got carried away.  I thought
I would show you it anyway as it took me ages to make it !The tree trunks etc.
do match up btw., photo taken from the side hence the missmatch look.

ps. already working on card number three.......will be more white
space this time I promise C&M !!!!


Saturday 21 May 2011

LIM (week 16) butterflies

It's week 16 over at Less is More and this week the theme is 'butterflies'. Thanks
so much C&M for an easy one this week (let's hope this is a trend......I very much
doubt it though!). Chrissie and Mandi do seem to like to keep our grey matter
working overtime mostly.Anyway here is my first effort this week(and yes they may
be more!).
Recipe
Square cardstock, I cut a Marianne Creatable butterfly ( took about 16 attempts),
rapidly going off it now....Couldn't turn it round for various reasons, used shims,
got there in the end but almost lost the will to live in the process. Then I used the
card with the butterfly shape cut out and applied Ranger Distress inks (Worn Lipstick,
Broken China & Dusty Concord at random. I used a tapestry stamp inked in black
for a background on the square card to add interest then 3d'd the card with the
cutout butterfly on top. Then the cut out butterfly was placed over the cut out
and glamour dusted.Looks sparkly but hard to see here, also hard to get  a
good photo of the fancy butterfly without it looking crooked! The colour looks
very vibrant irl, not pastel like my usual cards so I am trying something different
anyway:O)


Saturday 14 May 2011

LIM (week 15)

It's week 15 now over at 'Less is More' &
this week it's the dreaded 'one layer card'
& embossing as the theme.I made two cards
which I wasn't happy with, (one tiny black card
with a bee) & (then a flower & bee one),........
then decided on a love/Paris theme and an A6
card.I made SIX of these........much pulling out
of hair and very inky hands. I almost completed
each card only to smudge one element at the last
minute!!! Arrrggghhhhhh!!!! anyway here is  my final
effort............don't think there will be more!!!!!


Recipe
A6 card, I stamped various images
from Royal Langnickel 'Viva France'
stamps.Then I used my sentiment
stamp again,I used my embossing pen
and some gold embossing powder
for bubbles. I  dry embossed some
small hearts at the side and glittered
the Eiffel tower with glamour dust.

Wednesday 11 May 2011

LIM week 14 ( card 3)

Just can't stop making these flippin' LIM cards!!!!! arrrgghhhhh!
..............is there no help for this addiction??????
'Less is More'  challenge again, my last card for this week
..................I think!


 Square tent fold linen look card again,I embossed
a matt with the swirls folder then another strip with the
daisies folder. I cut a butterfly shape with a Marriane's
creatable die( plain one) then used the other one in the set to
cut a more detailed one( has more holes etc,). Added
a white satin ribbon then die cut two small butterflies.
I covered all the butterflies with diamond dust( looks
very 'twinkly' in real life ), then attached
pearls and some clear gems.........had to add gems as they
just 'needed something'...hope that's allowed!!!

ps. I have put a quick tutorial  on here now for the ribbon
flower I made , look at yesterday's post if you are interested.


Tuesday 10 May 2011

Ribbon flower tutorial

Just to let you know I will put a quick tutorial on later today
when I have a minute!Can't wait to make more of these now,
loving them :O) It is just made from a strip of ribbon btw!
Viv xx

Right here is my tutorial,......bear with me as it's my first !

This isn't my tutorial btw., I saw it somewhere  else on a blog.
Was surfing on my laptop and didn't make a note which one!!!
I have made a few changes to it also to do it my way here.

1. First cut about 15"( 38 cm)of satin ribbon. Then cut almost through
from side to side,about every 2 cms along the whole length.


Whole length of ribbon
with cuts.


Larger pic of right  hand side


Larger pic of left hand side


(Notice I make the cuts closer together as I get to the end. I think
that is better for the smaller petals which will go in the middle of
the flower.)
2. Next trim the corners of each top piece, doesn't have to be exact.


   Closeup


 3. Then with a heat gun gently heat the top part of the ribbon 'petals',
it's easier to hold the centre of them with tweezers or something similar.
You can tell when they have 'curled' enough by the shape at the top.


Notice I left the one at far right here( top pic) quite straight at the top........DON'T
lol it looks better curled!!!!! ...ahem wasn't a mistake, just to show
you what not to do :O)
4. When all the 'petals are curled,  punch or cut a circle from some spare
card. I used a circle punch and made a 1 1/2 "( 3 1/2 cm) circle. Then cover that with DS tape,
I used tiny glue dots on my first one as I was so eager to get it made.This is when it gets
very sticky!!!!! I also forgot I was using my best ribbon cutting scissors too ( agghhhhhhrrr).


5. Take the DS top layer off to expose the sticky part, then wind the ribbon 'petals'
around the outside of the circle...........gets a bit sticker here...be warned!The tiny bit
I left without DS is handy for holding btw.otherwise you get all stuck up.


6. Keep winding the ribbon round like this and try to
overlap the 'petals' a little so they look more natural.


7. Here is the second layer, I try to place the 'petals'
in between the first layer so they look more natural.


8. Here is the third layer..........almost done now!


9. Last layer in place, I try and twirl the centre with tweezers.
Then I stuck a pearl in the middle, could use flower soft or
stamens. I also trimmed the frayed bits which appear here
and there too. There you are a finished flower !!!!
 I decided to experiment with some colour and added a soft pink
to the edges and the middle................I am so full of ideas for these now
lol.....you can tell I am enthusiastic!! Anyway I hope you enjoyed this little tutorial
and it will inspire you to have a go also:O)


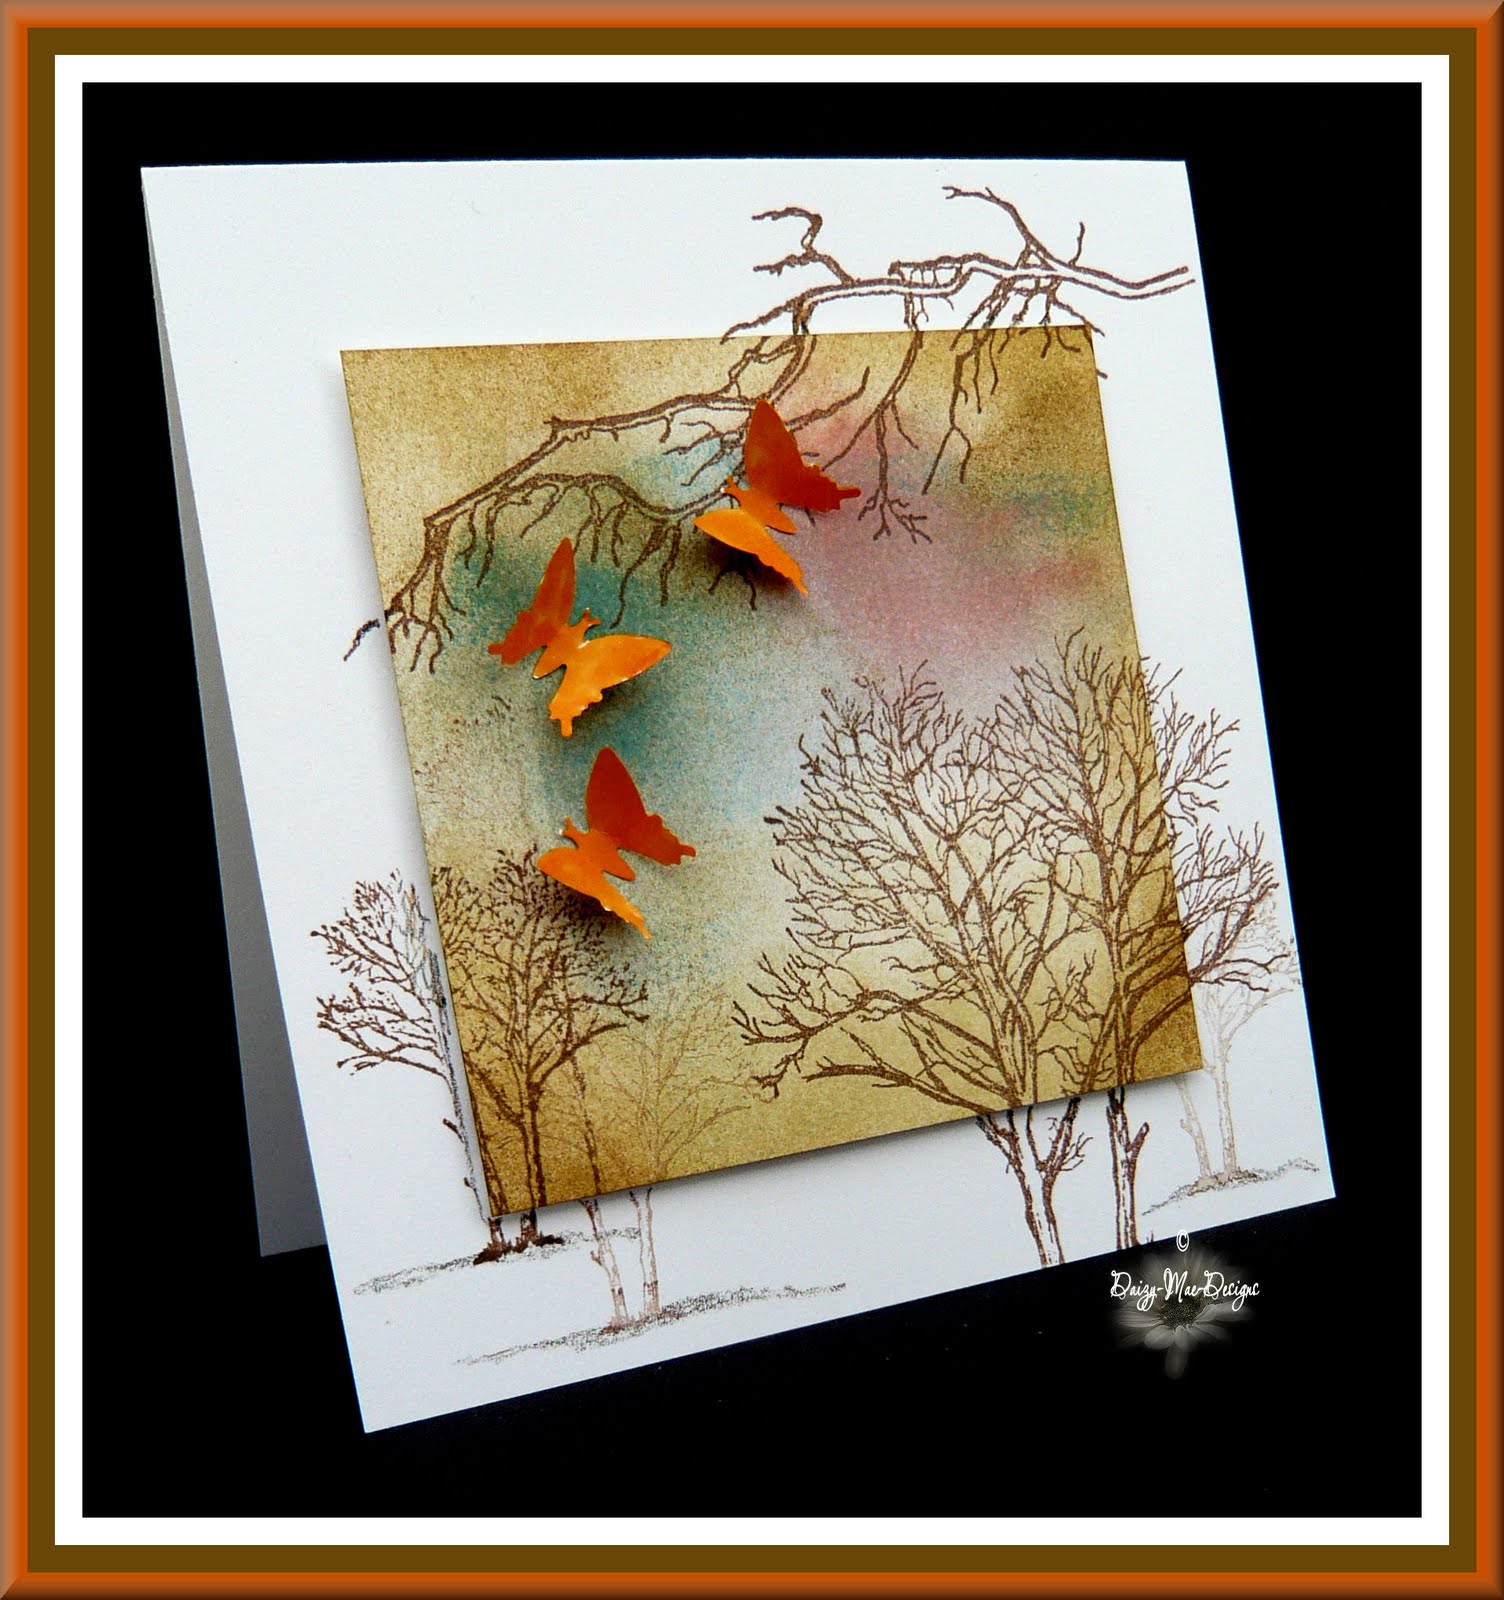
Here is the flower again so
you can see what it looks like
on a card.

Viv xx


ps. Chrissie and Mandi .....don't look at the card,
I may want to post it at a later date as a LIM card lol :O)


Monday 9 May 2011

LIM week 14 (card 2)

Another card for 'Less is More' again. I made a lovely ribbon flower, was so excited
about trying out the idea, I made it in a bit of hurry( should have curled the middle more)
but loving the idea now. Saw the instructions on another blog while surfing on my laptop
and didn't save which is was now. Will be making more though! Just a simple card
otherwise but all white again so fits the brief for this weeks challenge.Just layer of
embossed dots then I cut some hearts & glittered them with glamour dust AGAIN,
then added leaves using a punch too.Added my flower and a pearl to the centre also.
Hope this photo looks better...probably not but he ho! Thanks for all the encouraging
comments again fellow LIMettes, you are all so lovely..... and C & M of course :O) 
Viv xx
ps. Late again getting round to visiting all your blogs last week , I will try to be quicker
this week........wedding 'stuff ' to blame again I'm afraid!


Sunday 8 May 2011

LIM ( week 14) card 1

Week 14 now over at 'Less is More', the challenge this week
is to make a 'white on white card'. I thought this would be quite easy,
......hmmm how wrong I was.The card was made quite quickly
but then I had so much trouble trying to get a decent photo of
the darn thing grrrr!!!!! So apologies about the terrible photo,
also I managed to resize by watermark ( accident) and  then
had a terrible job trying to make a new one( quite forgot how
to do it). Anyway here is my effort  for this week........there
may be more..............then again there may not  judging by
my last effort lol.
Recipe.......
I made a square 5 1/2 " tent fold linen card as usual , then cut
two smaller squares using my nesties.
Then I embossed one with the small hearts folder. I used a die to cut the wording,
then glittered it with glamour dust and stuck in to the front panel.I punched some
flowers and leaves & added some small pearls to the middle of those.


Not sure this is a better pic and why did the copyright symbol get smaller again??  


Thursday 5 May 2011

LIM (Week 13) Lucky dip card 2

Here is another quick card for this weeks challenge at 'Less is More'.
Easy challenge this week ( thankyou, thankyou, thankyou) either a
thankyou or a congratulations card,so went with the latter this time.
Anita's rubber stamp( had it for ages),computer generated sentiment.
I used a printed  (PP Damask pink colour) strip of card & white strip
  & the snow type Cuttlebug folder to emboss the little matts. Image
cut with nesties and backing same PP pink cut with nestie too. Image
coloured with Copics, glamour dust on flowers, two gems added.
Am so addicted to LIM now couldn't resist another card lol. You
should see the state of my craft room now, stuff everywhere.......but
quick card made :O)


Tuesday 3 May 2011

LIM ( week 13) lucky dip( card 1)

It's lucky dip week this week over at 'Less is More',
the theme is thankyou or congratulations. Thanks Diva LIM Mandi
& Lady LIM Chrissie too!!!!! for all the help with finding the challenge
this week.I just kept refreshing the page I had open and it looked the
same as last week , no new challenge.Blonde moment I fear !!!!!!!!I do
feel an idiot now I realise my mistake he he!!!!
I must admit I thought you were taking a long bank holiday lol. I am sooo
stupid at times!! Anyway here is my card, just made very quickly for a change.
I wish every week was like that....................just don't mention acetate to me!!!
A6 tent fold card, I used a strip of card printed with a  blue PP background,
(damask I think). Then I stamped direct to card ( oh I am loving this now!!!)
using my new Anita's stamp in black momento ink. I added three daisies from
Wild Orchid Crafts and stuck a clear gem onto the daisy on the stamping bit,
.....card made!A simple one but I quite like simple these days ......after all
Less is More  :O) Have a lovely week everyone!


Pinterest button

LinkWithin

Related Posts Plugin for WordPress, Blogger...